۸ Fixes for Phone Link App Not Showing Notifications on Windows 11
The Microsoft Phone Link app is extremely handy when connecting your mobile device to your Windows device. And with the recent addition of iPhone support, it’s bound to become a fan favorite. But what happens when the Phone Link app notifications abruptly stop working? And is there a way to fix the Phone Link app not showing notifications on Windows 11? Let’s find out.
Mobile notifications can be for anything: messages, calls, emails, etc. And missing one or two might be a big deal, especially if you’re working in a role that requires your constant attention. So, let us have a look at 8 easy ways you can fix the Phone Link app not showing notifications on Windows 11.
Note: Before proceeding with the steps, ensure that the Battery Saver mode is disabled. You can check our guide to disable Battery Saver on your Windows device.

۱. Check Phone Link App Notification Settings
Before fixing the issue of the Phone Link app notifications not working, it is always worth checking if all the necessary settings have been enabled on your Windows device. This way, you can ensure that Phone Link notifications have not been blocked by Windows settings instead. Follow the below steps to do it.
Step 1: Use the Windows + I key to open Settings.
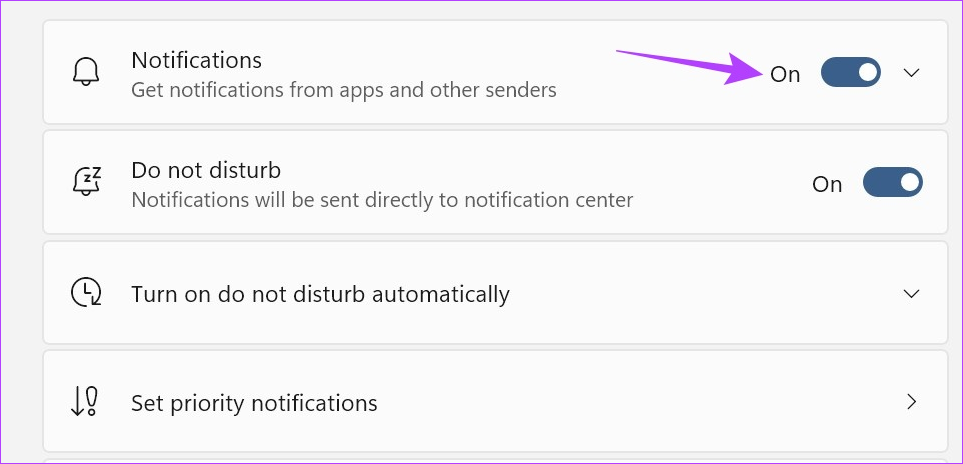
Step 2: Then, go to System and click on Notifications.
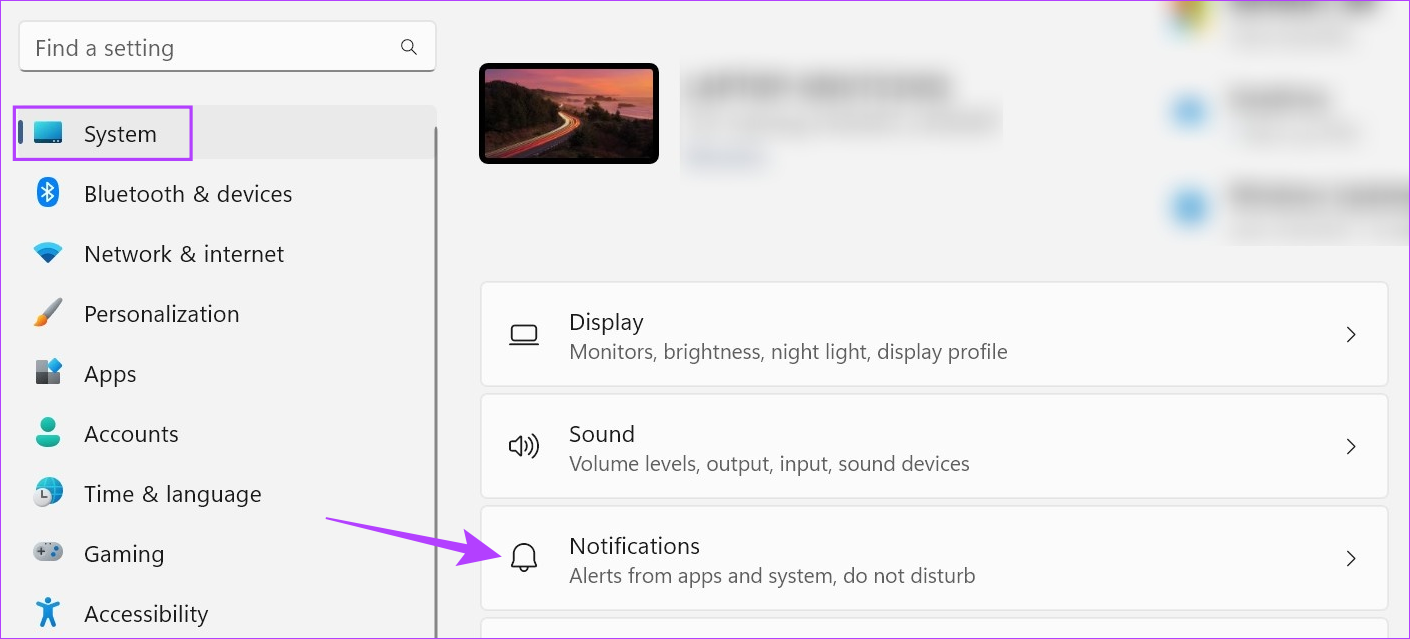
Step 3: Here, turn on the toggle next to Notifications.
Step 4: Then, scroll down and click on Phone Link.
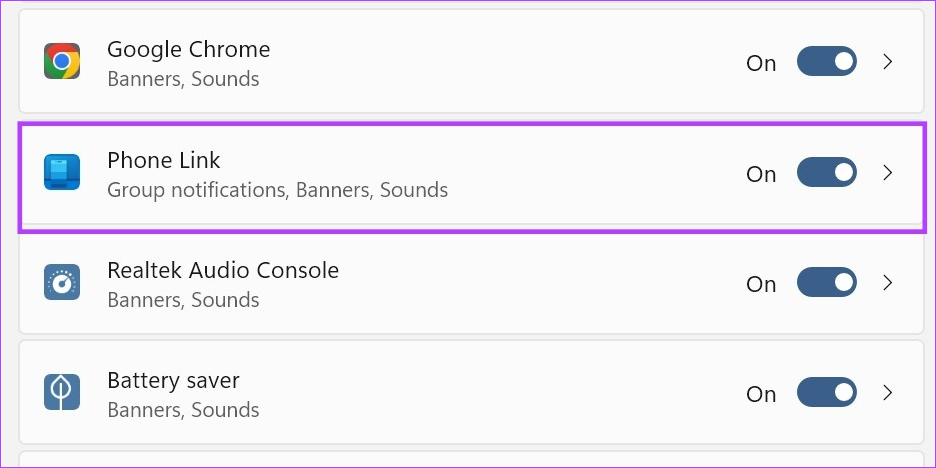
Step 5: Ensure the toggle for Notification is turned on.
Step 6: Additionally, check the box for ‘Show notification banners’ and ‘Show notifications in notification center’.

Step 7: You can also use the below toggles to turn on sound for notifications and set notification priority according to your preference.
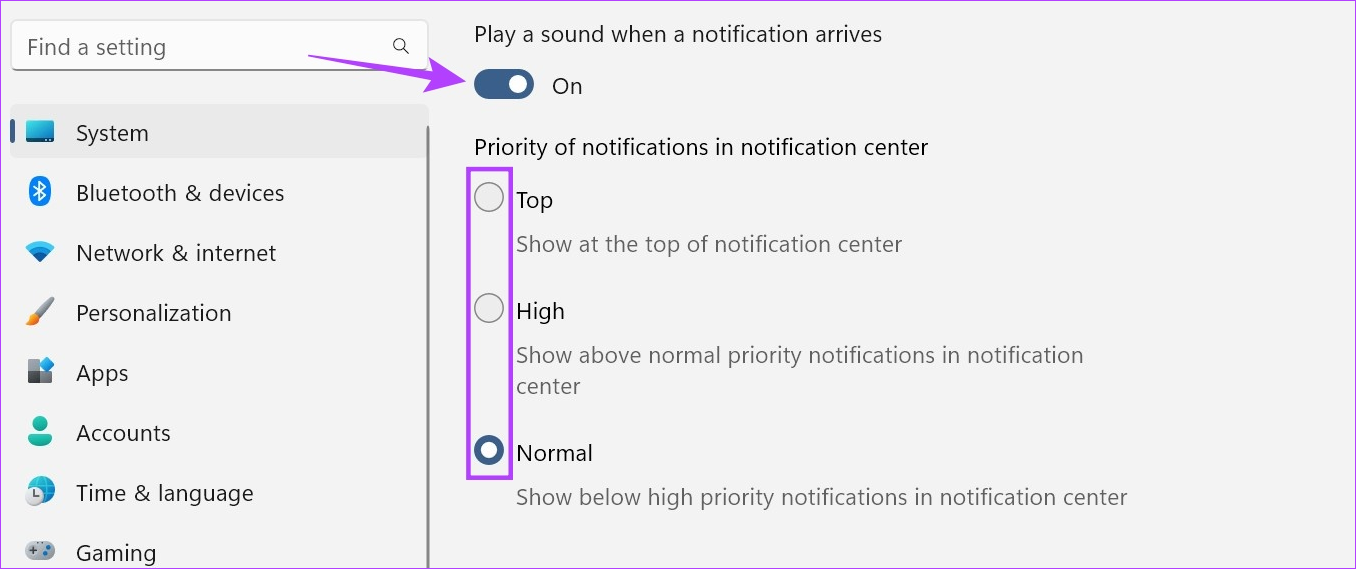
This will ensure Phone Link notifications are not throttled by your device’s settings.
۲. Turn On In-App Notification Settings
Just like checking your system’s settings, you can also go through the Phone Link app’s settings menu and check that all the necessary settings have been enabled. Here’s how.
Step 1: Go to Search and type Phone Link. Open the app from the search results.
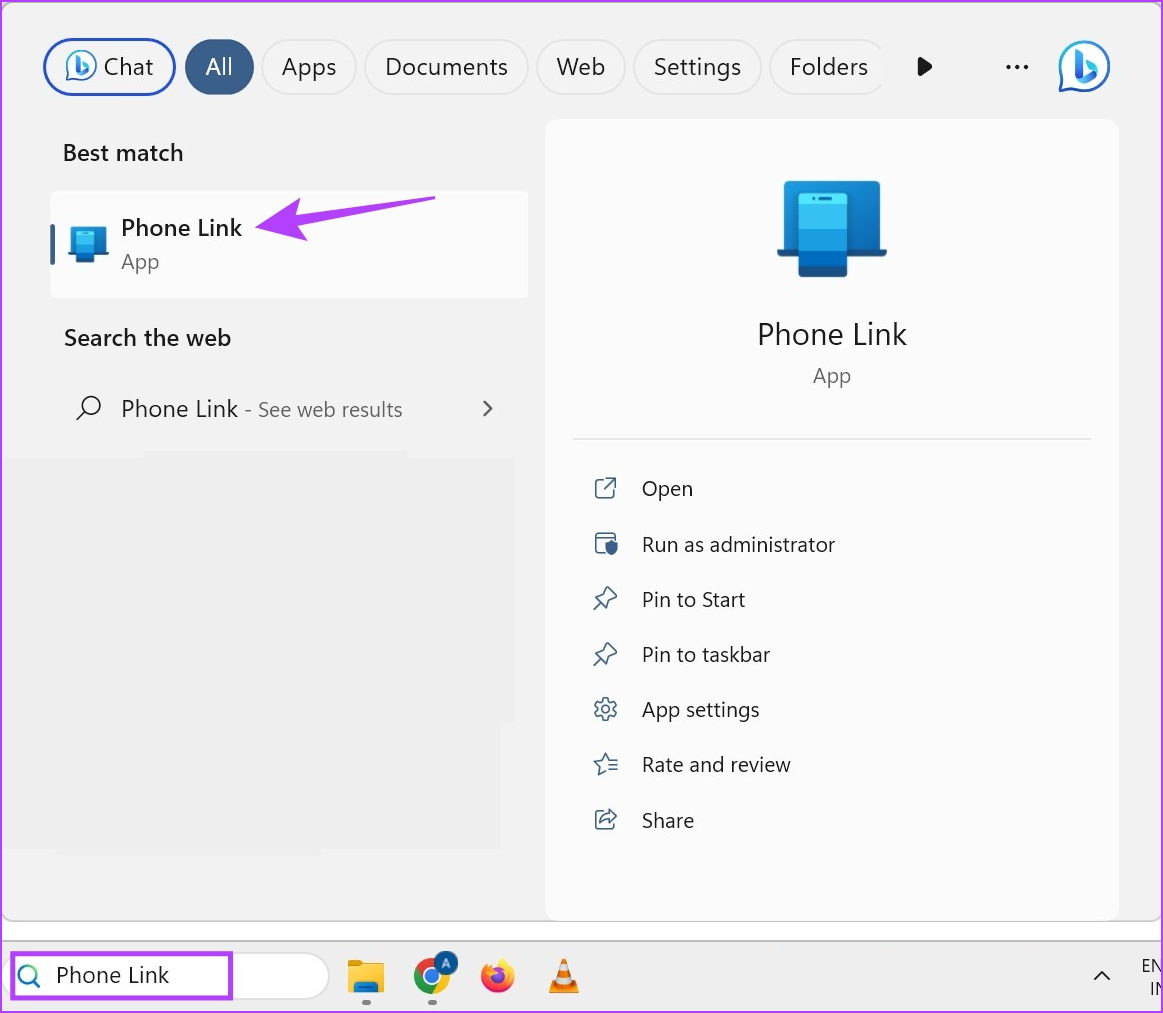
Step 2: Here, click on the cogwheel icon.
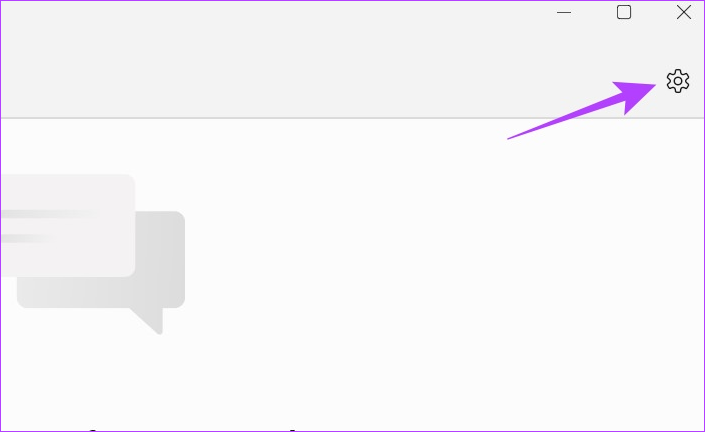
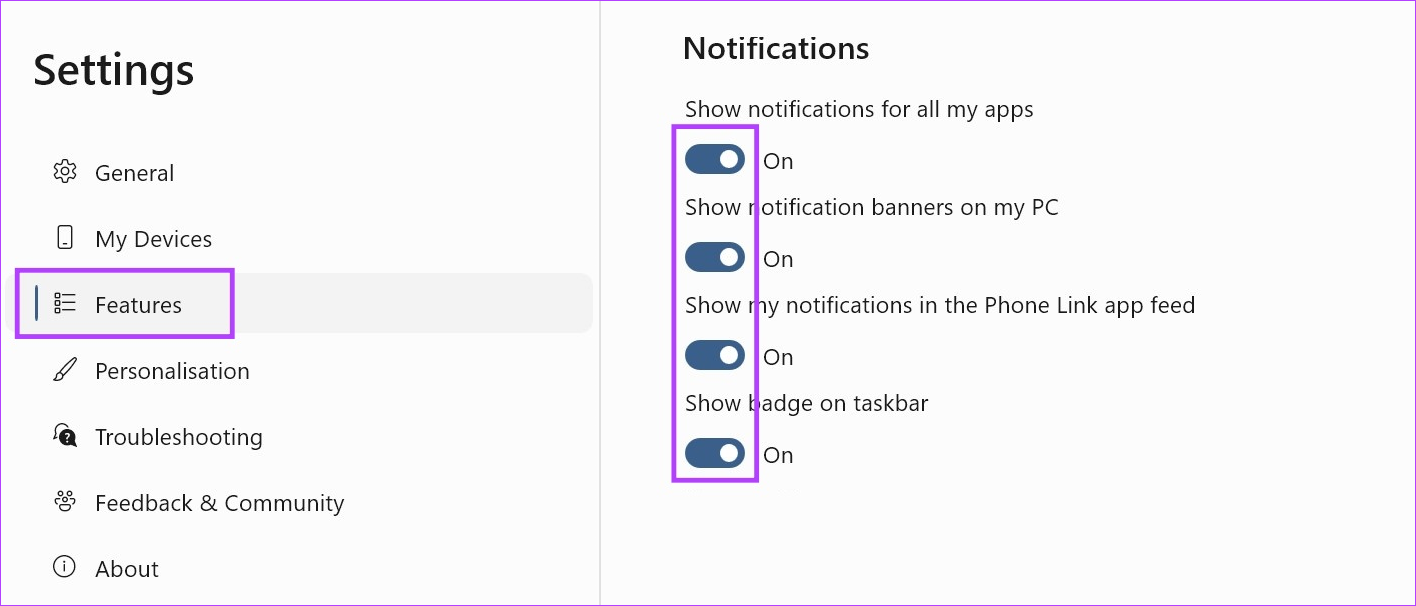
Step 3: From the menu options, click on Features.
Step 4: Go to the Notifications section and ensure all the necessary toggles are enabled.
Step 5: Additionally, for notifications for specific apps, scroll down and click on ‘Choose which apps I get notifications from’.
Step 6: Once the list of apps opens, go to the target app and click on the drop-down.
Step 7: Here, select ‘Notification feed + banner’.

You can also repeat the above steps for any other app that you wish to specifically enable notifications for. If the Phone Link app still doesn’t show notifications on Windows 11, move on to the next method.
۳. Check Wi-Fi Connection
The Phone Link app uses both Bluetooth and Wi-Fi to help sync your phones with your Windows device. This means that an unstable Wi-Fi connection might cause trouble when using the Phone Link app. To make sure that is not the case, check the internet speed. If the results are less than ideal, connect to a better network or move your device closer to the Wi-Fi router to increase signal strength.
۴. Allow Background App Permissions
If your Windows device has blocked the Phone Link app from running in the background, it might face issues when syncing the notification. So, to fix Phone Link app notifications not working, you can allow the Phone Link app to run in the background on Windows 11. Here’s how.
Step 1: Open Settings using the Windows + I key.
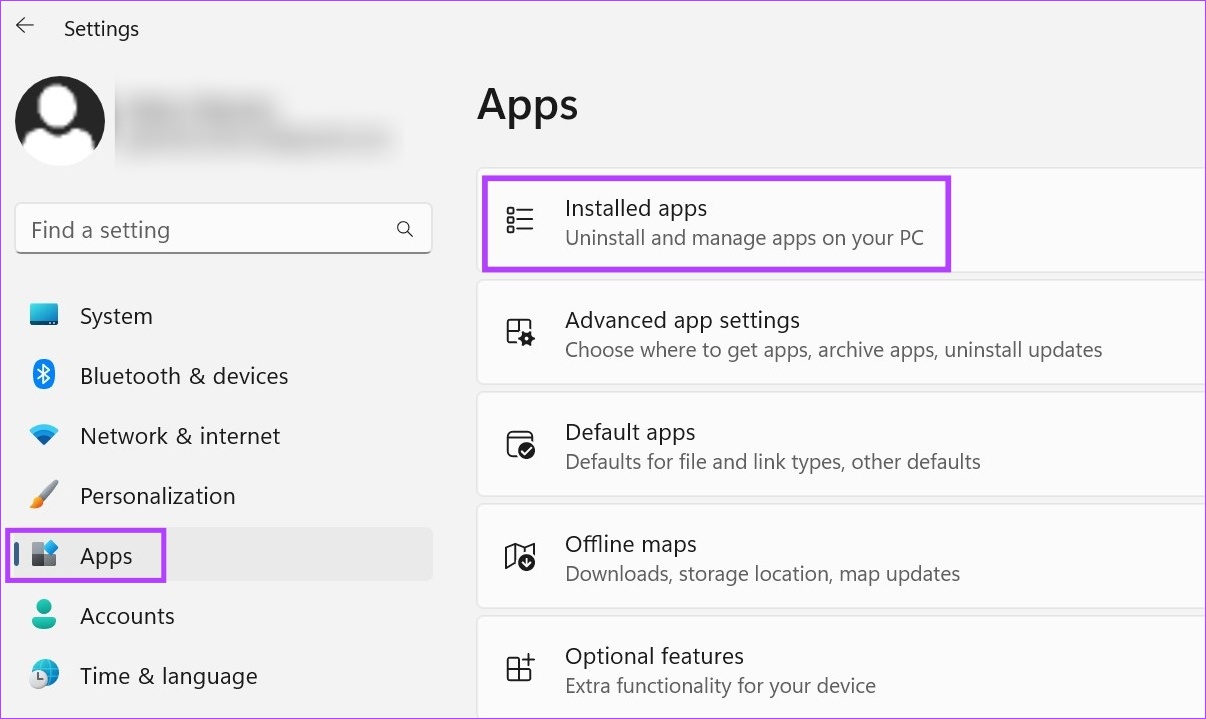
Step 2: Here, go to the menu bar and select Apps.
Step 3: Then, click on Installed apps.
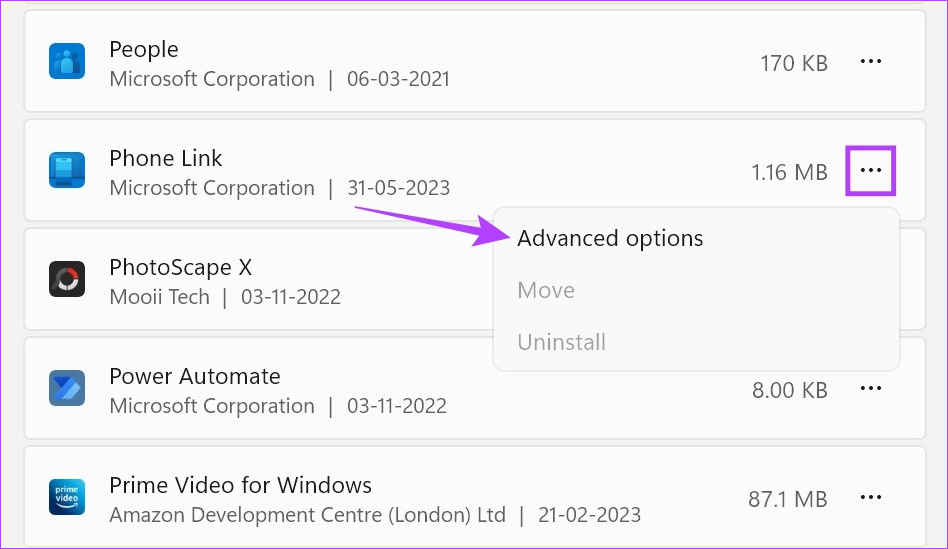
Step 4: Scroll to the Phone Link app and click on the three-dot icon.
Step 5: Click on Advanced options.
Step 6: Here, go to ‘Background apps permissions’ and click on the drop-down.
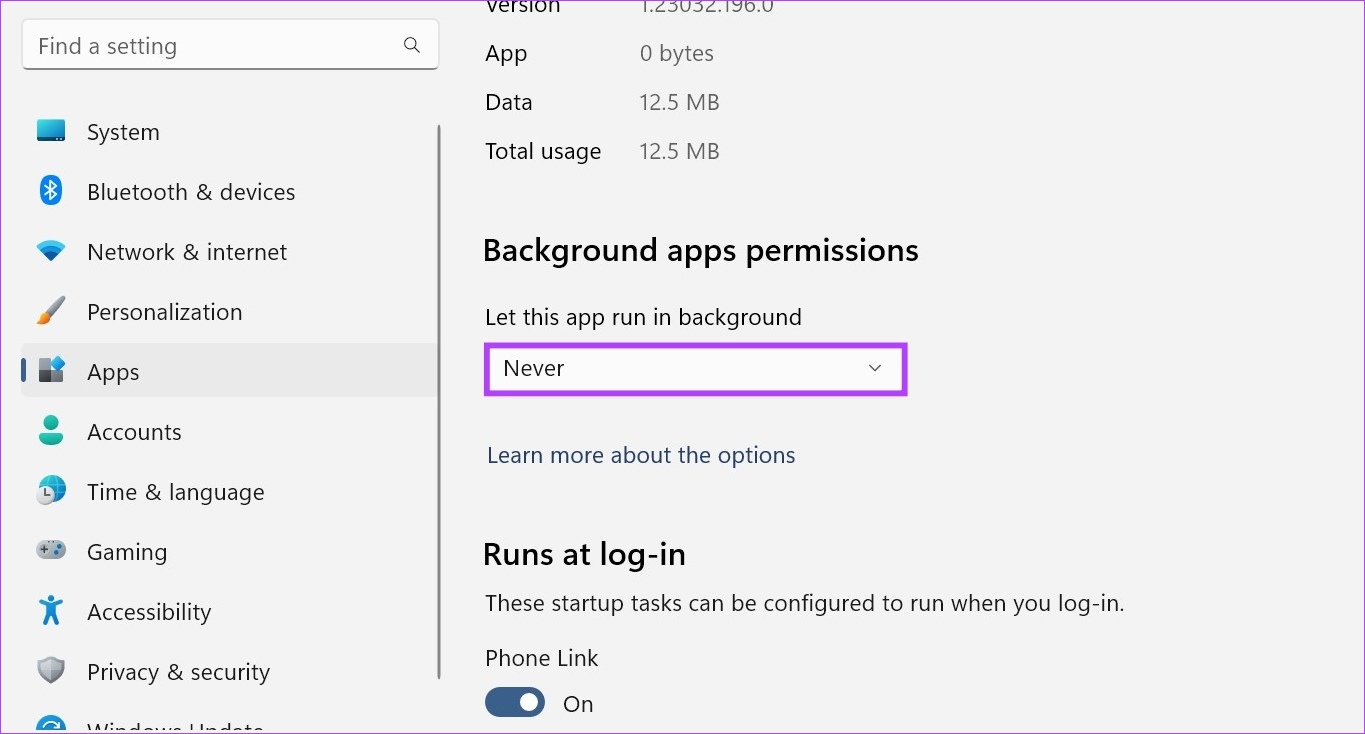
Step 7: Select Always.
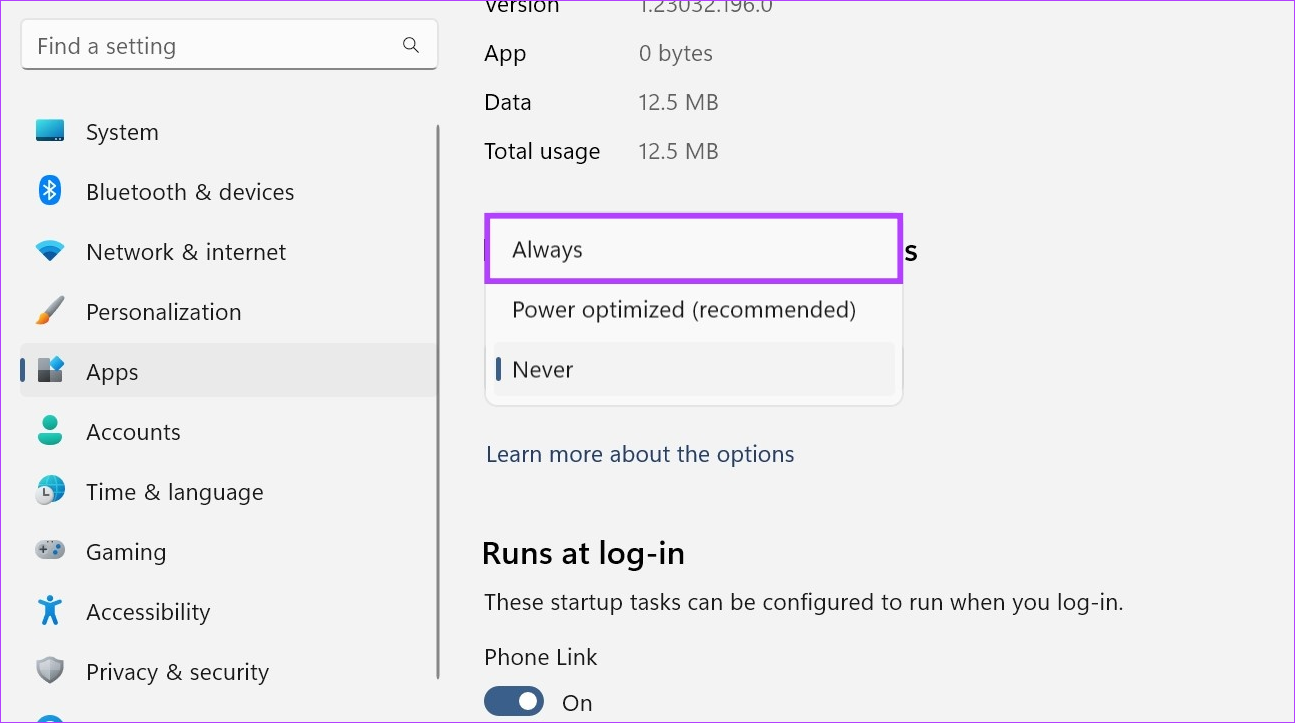
This will allow the Phone Link app to use system resources even when running in the background.
۵. Turn Off DND on Windows
While the do not disturb mode is a good way to give you some uninterrupted screen time, it can also block notifications from apps like Phone Link. So, to make sure this does not happen, you can turn off DND on your Windows device. Here’s how.
Step 1: Use the Windows + I key to open the Settings menu.
Step 2: Here, click on System from the menu options.
Step 3: Click on Notifications.

Step 4: Then, turn off the toggle for ‘Do not disturb’.

Step 5: Additionally, click on ‘Turn on do not disturb automatically’ to expand the menu options.
Step 6: Uncheck the ‘During these times’ box.
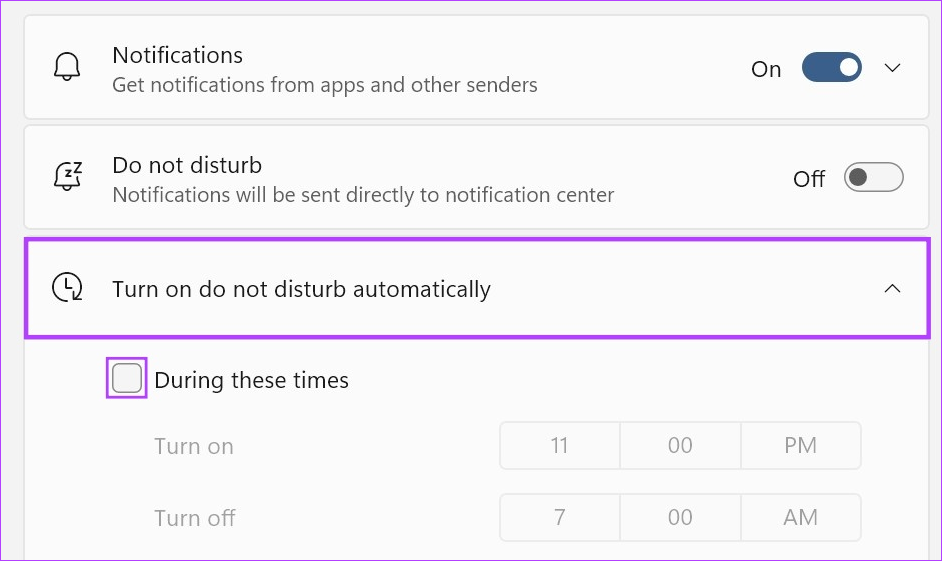
This will ensure DND does not turn on automatically on Windows 11.
۶. Allow Background Permissions for the Phone Link Mobile App
While the notification settings on Windows can prevent Phone Link from working as expected, if the app is not allowed to run unrestricted or update in the background, it might also end up causing issues like notifications not working.
To ensure this does not happen, you can unrestrict the Phone Link app on your Android device and turn on the background app refresh on your iPhone. Here’s how:
Unrestrict Link to Windows App (Android)
Step 1: Open Settings and tap on Apps.
Step 2: Scroll down and tap on ‘Link to Windows’.
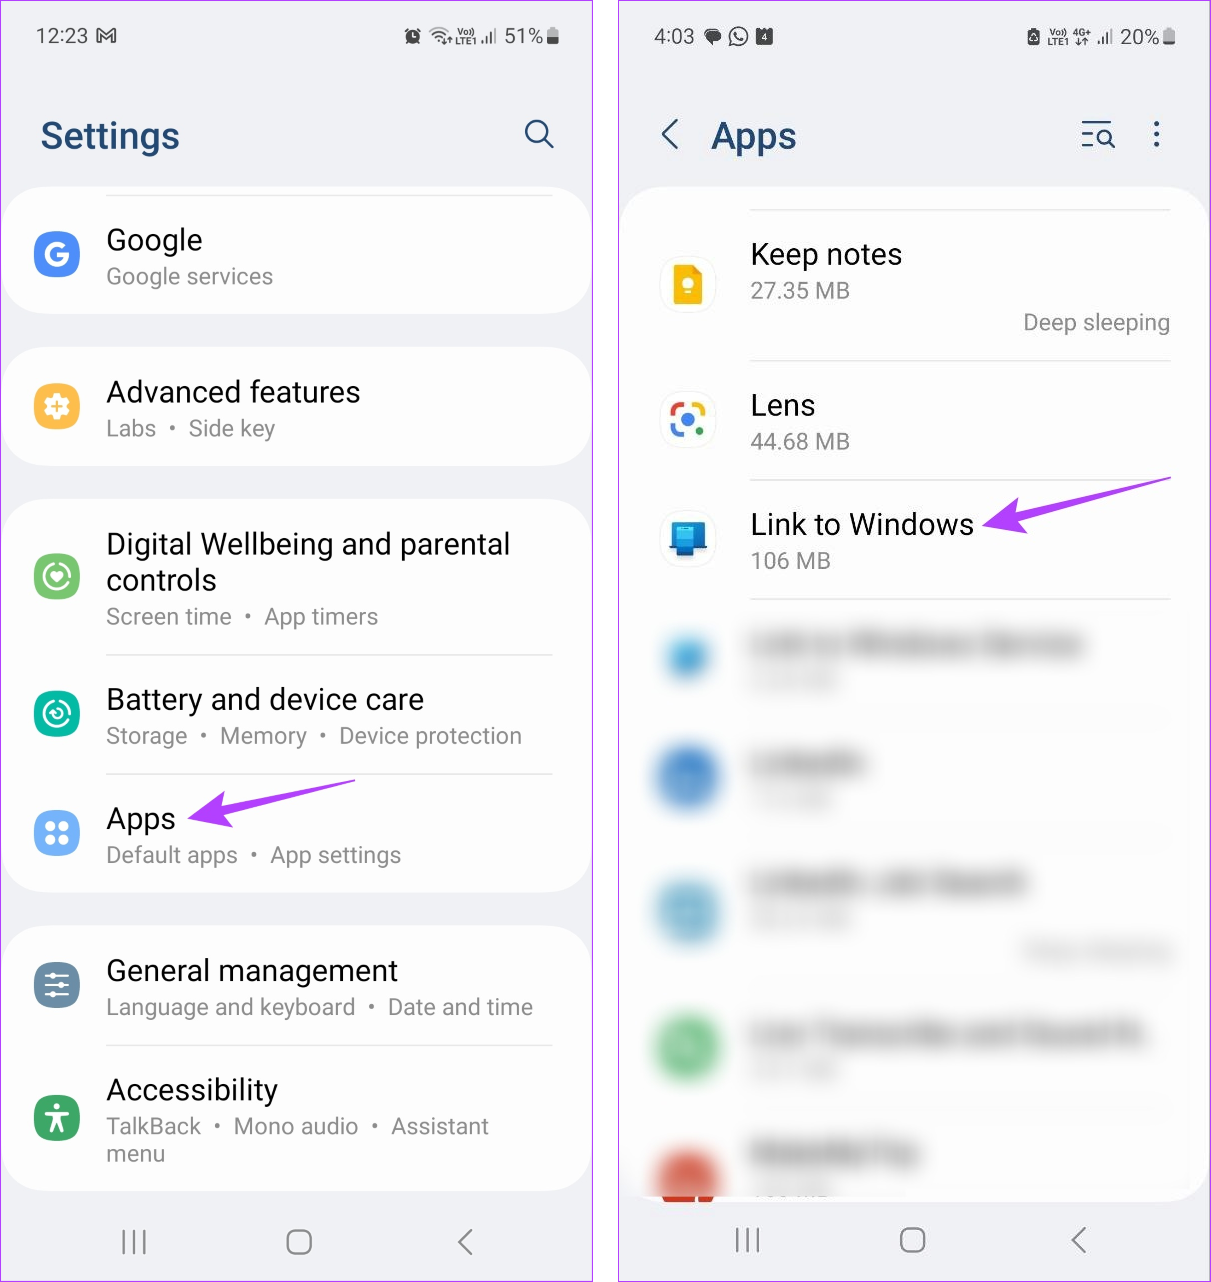
Step 3: Here, tap on Battery.
Step 4: Check if the Unrestricted profile has been selected.

This will ensure the Phone Link Android app can run in the background unrestricted.
Allow Background App Refresh (iOS)
Step 1: Open Settings.
Step 2: Tap on General.
Step 3: Scroll down and tap on ‘Background App Refresh’.
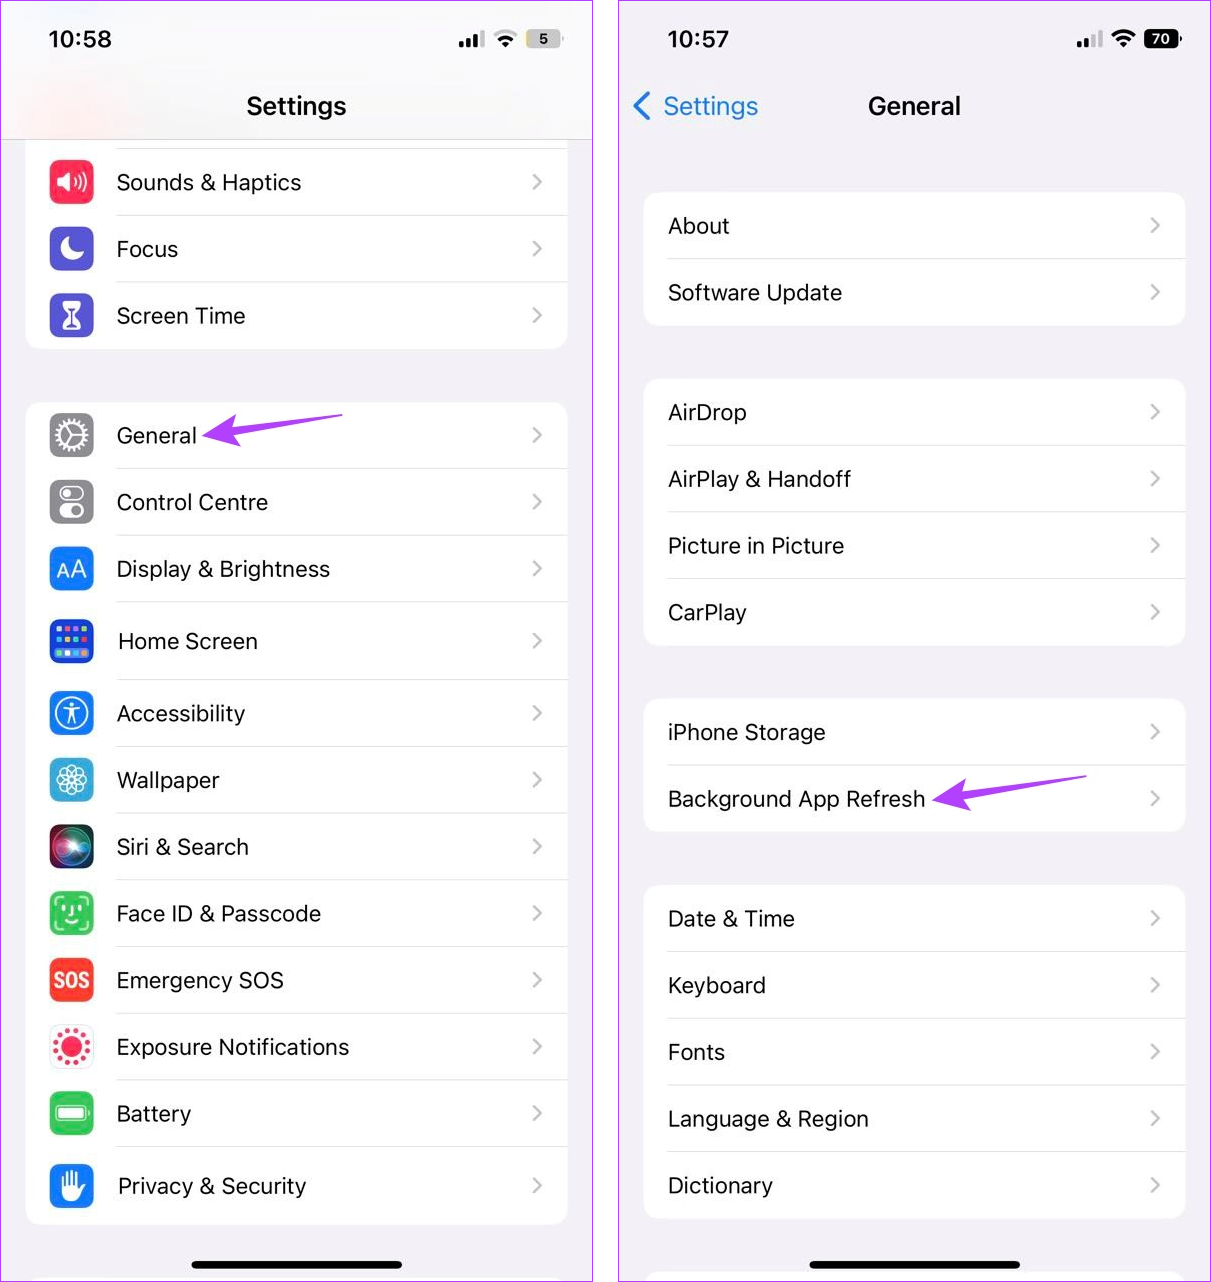
Step 4: Here, tap on ‘Background App Refresh’ again.
Step 5: Select ‘Wi-Fi & Mobile Data’.

This will ensure background app refresh is available for the Phone Link iOS app.
۷. Unlink and Relink Device
If you’re still experiencing issues with notifications not working on the Phone Link Windows app, try unlinking and then relinking your Windows device with your Android or iOS device. This will resolve any connection issues that might be preventing notifications from working properly.
Follow the below steps to do it.
On Android
Step 1: Go to Search and type Phone Link. Then, open the Phone Link app on Windows 11.
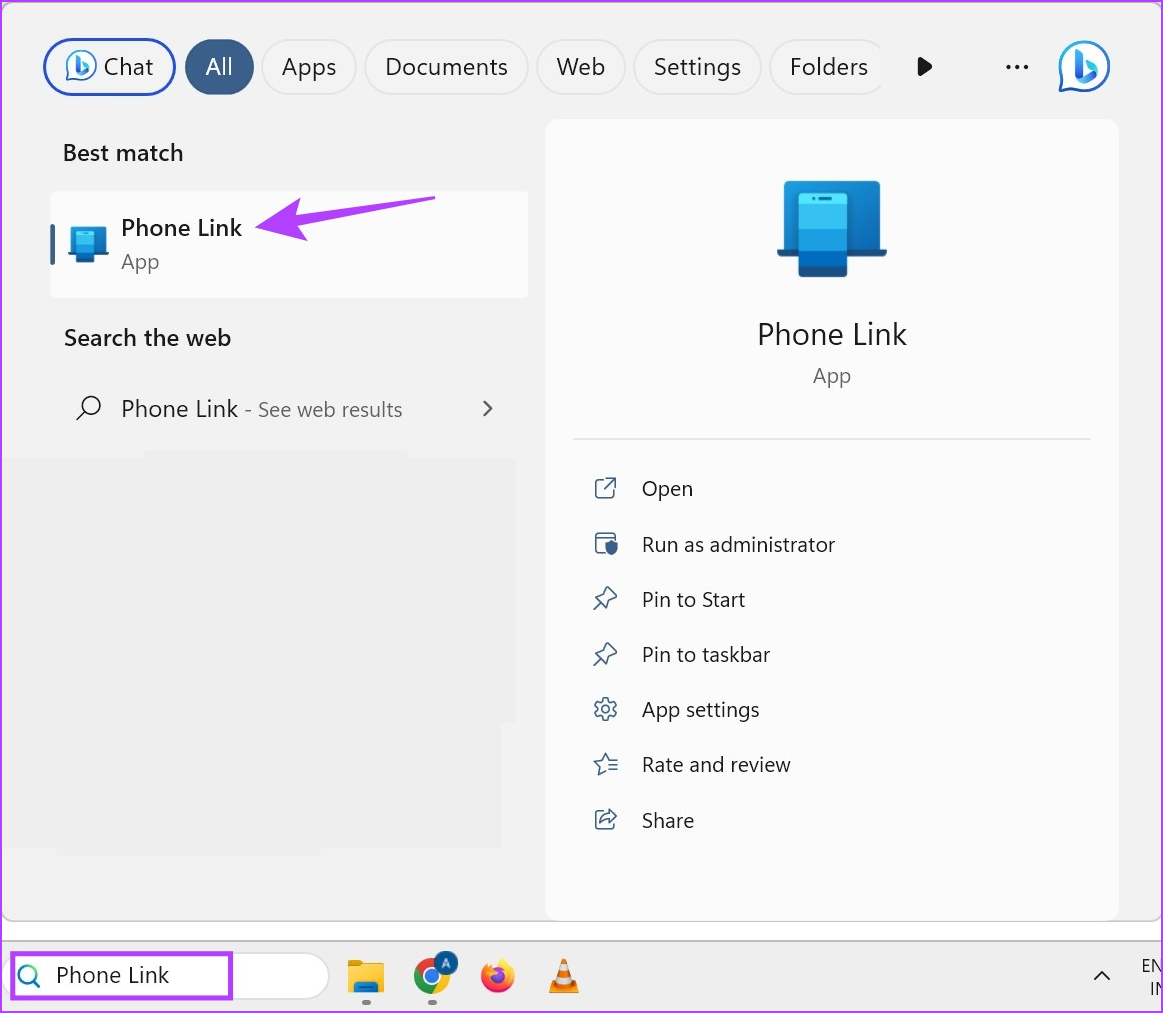
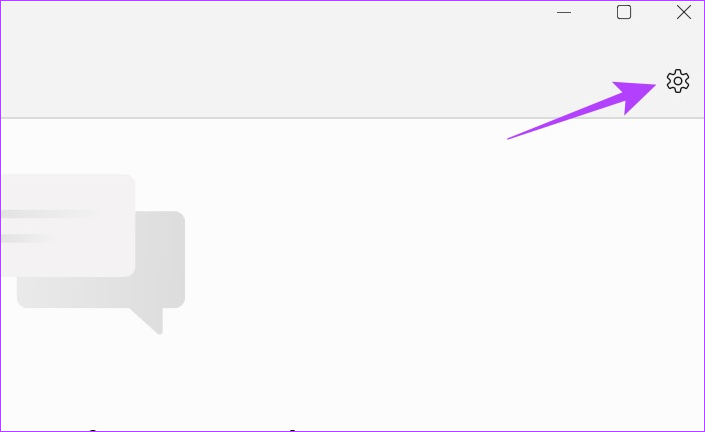
Step 2: Here, click on the cogwheel icon in the top right corner.
Step 3: From the menu options, click on My Devices.
Step 4: Now, go to your phone and click on the three-dot icon.
Step 5: Click on Remove.

Step 6: Here, check the undertaking and click on Yes, remove.
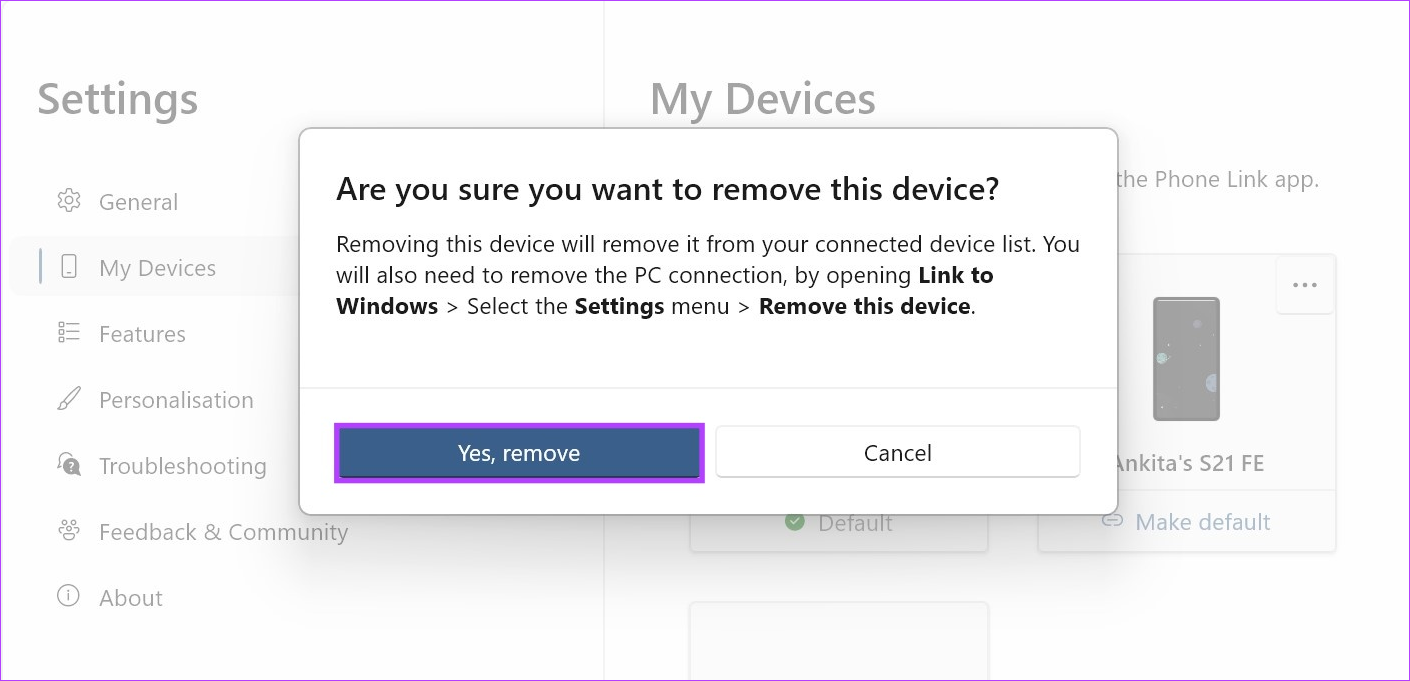
This will remove the device from your Windows Phone Link app. Now, to completely remove the device, open the Phone Link mobile app and follow the below steps.
Step 7: Open the ‘Link to Windows’ app and tap on the cogwheel icon.
Step 8: Scroll down and tap on ‘Sign out of Link to Windows’.

Step 9: Then, tap on Unlink.
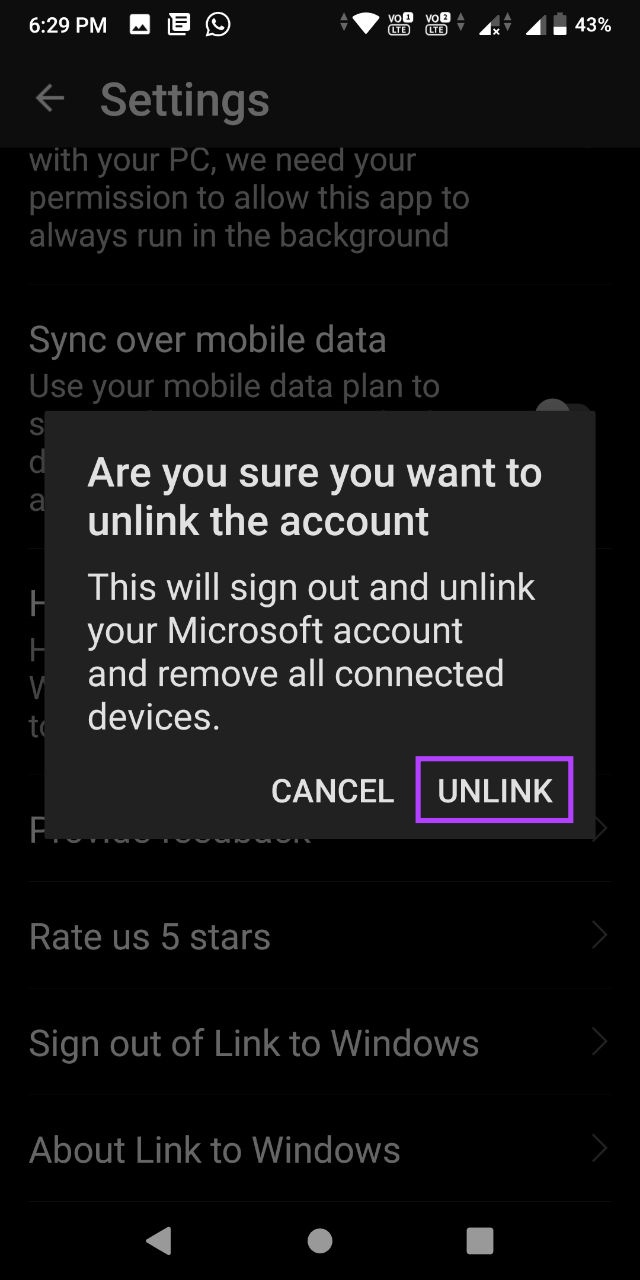
This will unlink your Phone Link app. Now, follow the below steps to relink the app with your Android device.
Step 10: Open the Phone Link Windows app.
Step 11: Here, click on Android.

Step 12: Check the box for ‘I have the Link to Windows app ready’ and click on ‘Pair with QR code’.
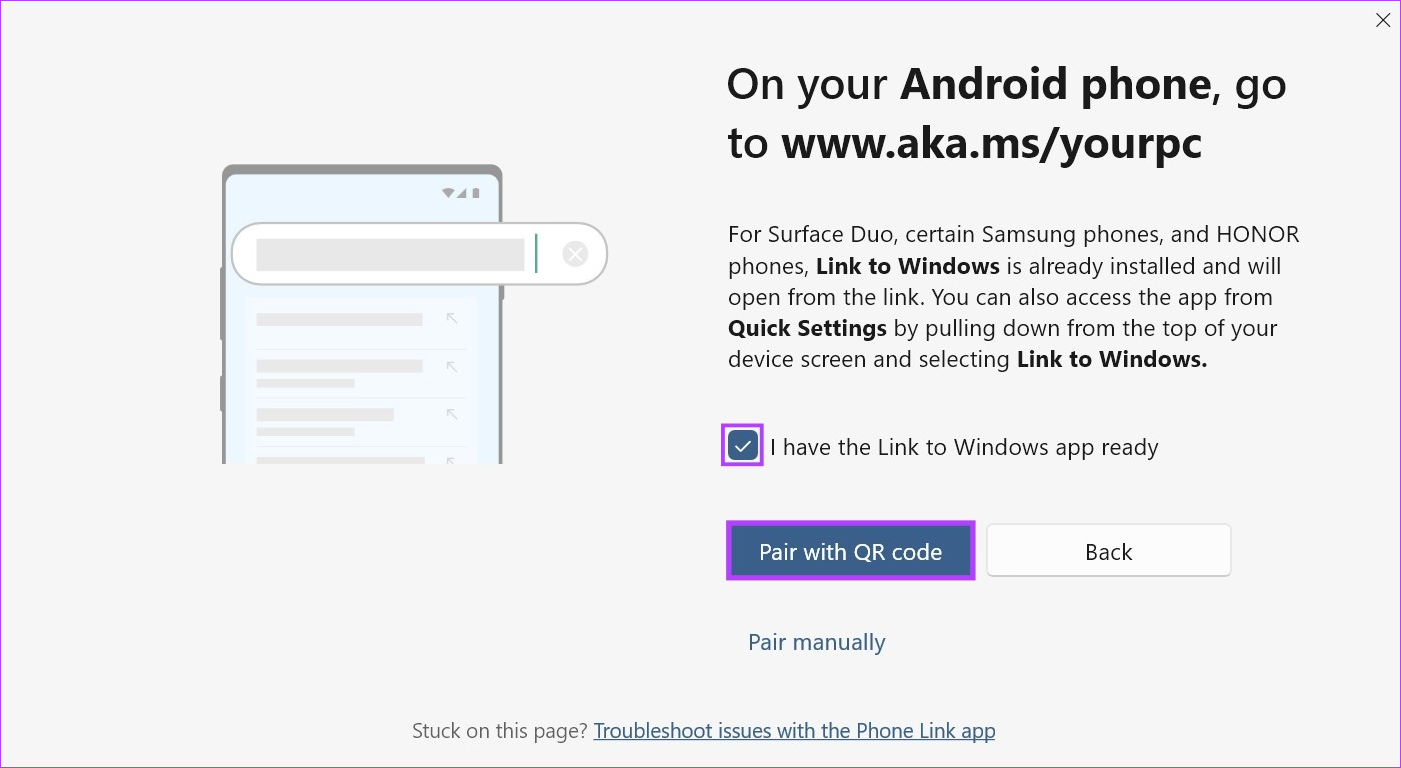
Step 13: Once the QR code appears, open the Link to Windows app on your Android device.
Step 14: Here, tap on ‘Link your phone and PC’.
Step 15: Tap on Continue.
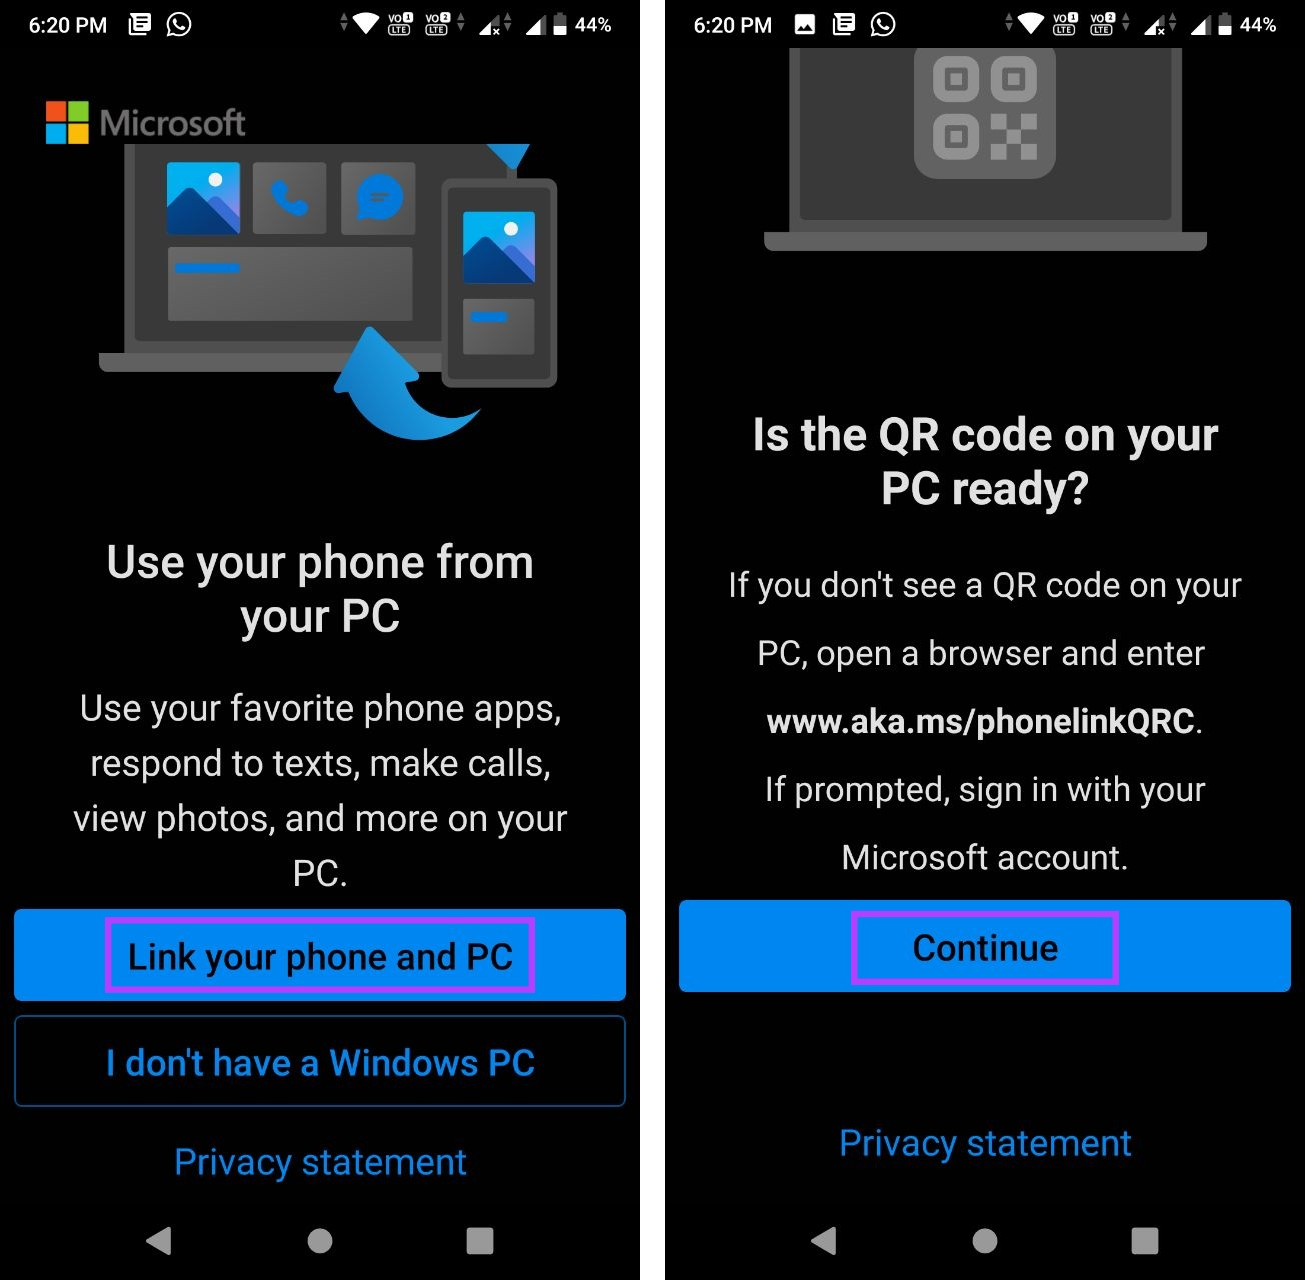
Step 16: Use the scanner to scan the QR code visible on your Windows device.
Step 17: Then, tap on Continue.

Grant all the necessary permissions to get the Phone Link Android app up and running. Then, check if the notifications are working as expected.
On iPhone
Step 1: Open the Phone Link app on your Windows PC and click on the cogwheel icon.

Step 2: Here, click on My Devices.
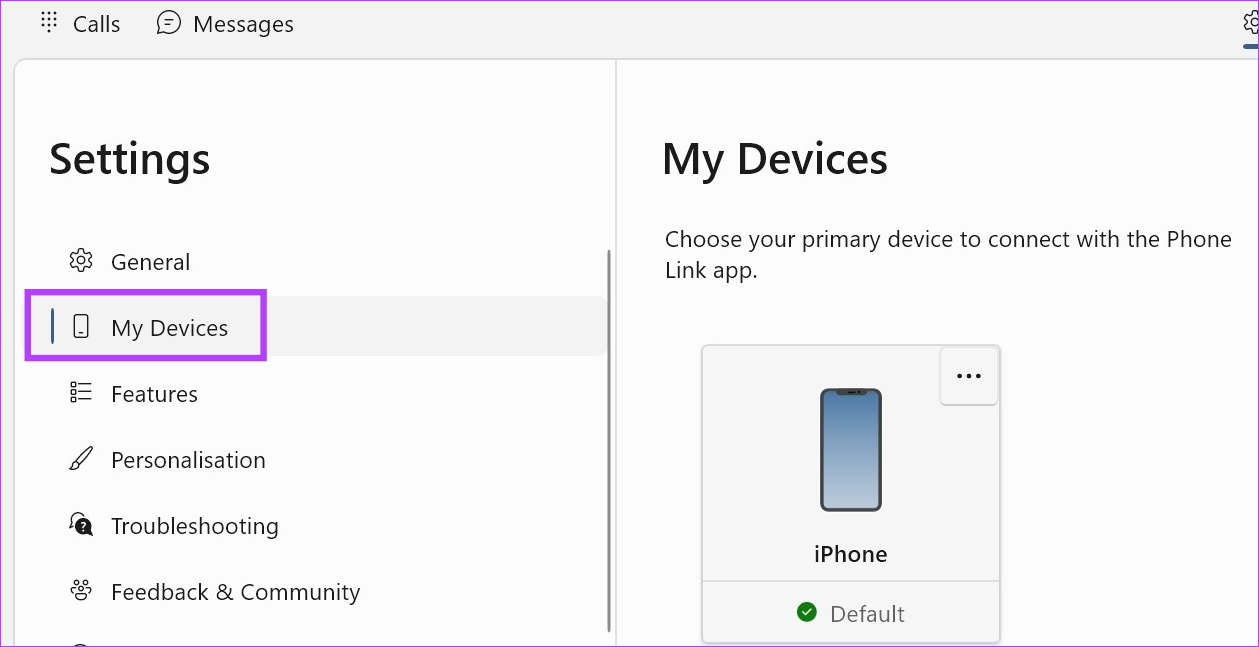
Step 3: Go to your iOS device and click on the three-dot icon.
Step 4: Then, click on Remove.

Step 5: Check the option and click on Yes, remove.
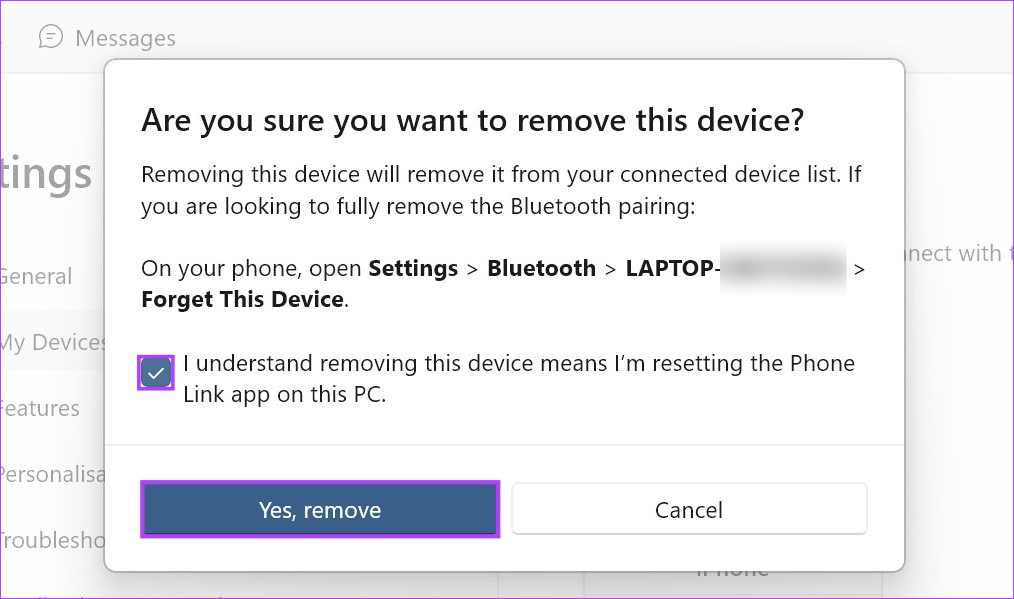
This will remove the device from the Windows app. Now, to complete this process, go to your iPhone’s Bluetooth menu and remove your Windows device. Here’s how.
Step 6: On iPhone, open Settings and tap on Bluetooth.
Step 7: Form the list, tap on your Windows device.

Step 8: Tap on ‘Forget This Device’.
Step 9: Then, tap on Forget Device.
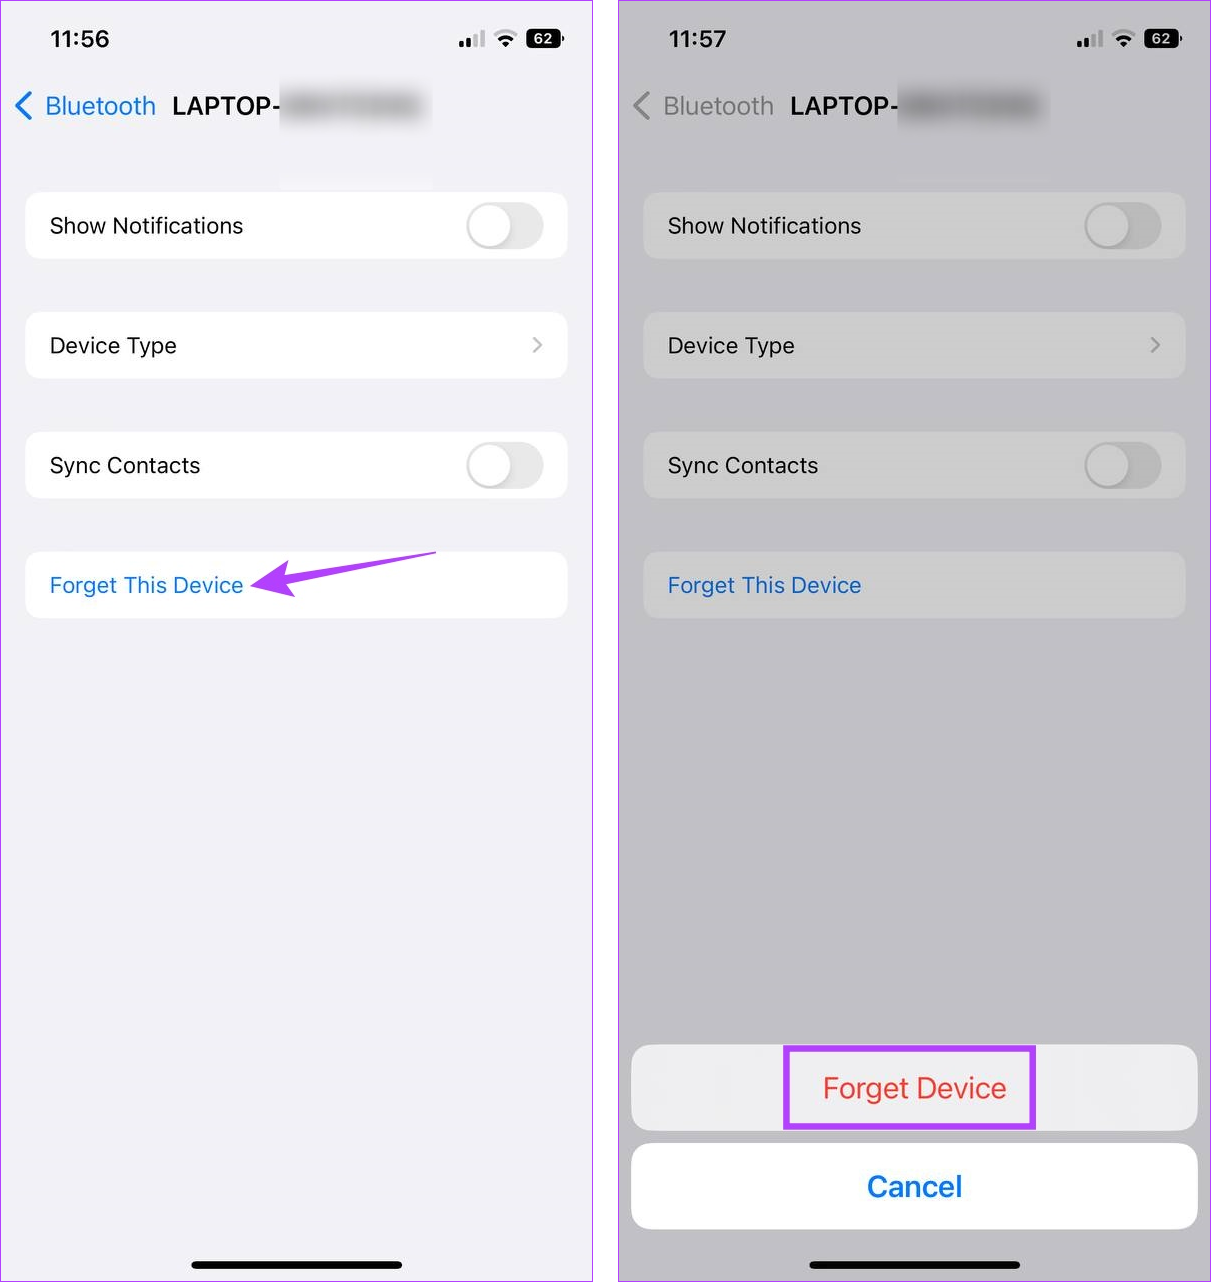
Now, open the Phone Link app again and relink both devices. Here’s how.
Step 10: Open the Phone Link Windows app and click on iPhone.
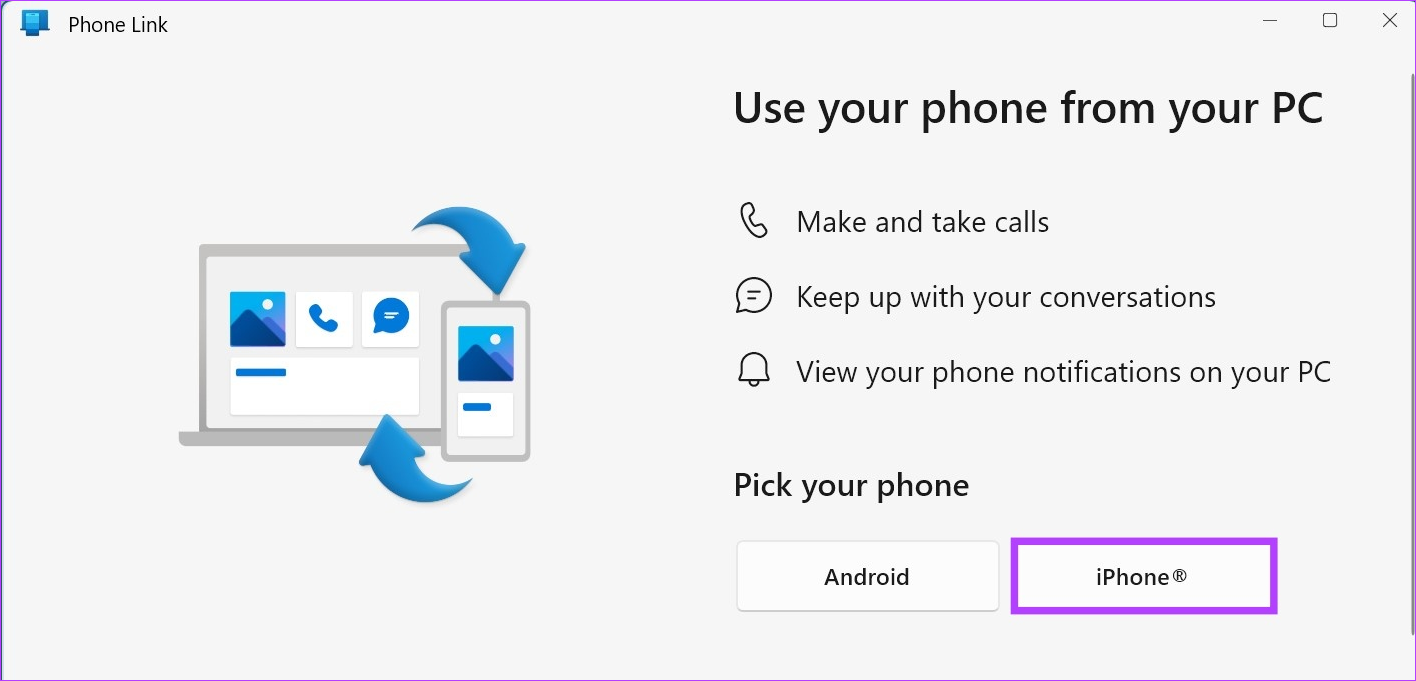
Once the QR code appears, open the Phone Link iOS app and proceed with the following steps.
Step 11: Open the Link to Windows app.
Step 12: Here, tap on ‘Scan QR code’.
Step 13: Then, scan the code visible on your Windows device.
Step 14: Once you confirm the code, tap on Pair.

Confirm that all the permissions have been granted and then check again if notifications are working properly. If not, move on to the next fix.
۸. Update the Phone Link App
As mentioned above, due to the very recent addition of the iPhone to the Phone Link app, certain updates are being rolled out to ensure the stability of the app. This means that if any app updates are currently pending, they might end up affecting certain app functions, like not getting calls or other app notifications on your Windows PC. To fix this, open the Microsoft Store and install any pending updates.
Follow the below steps to do it.
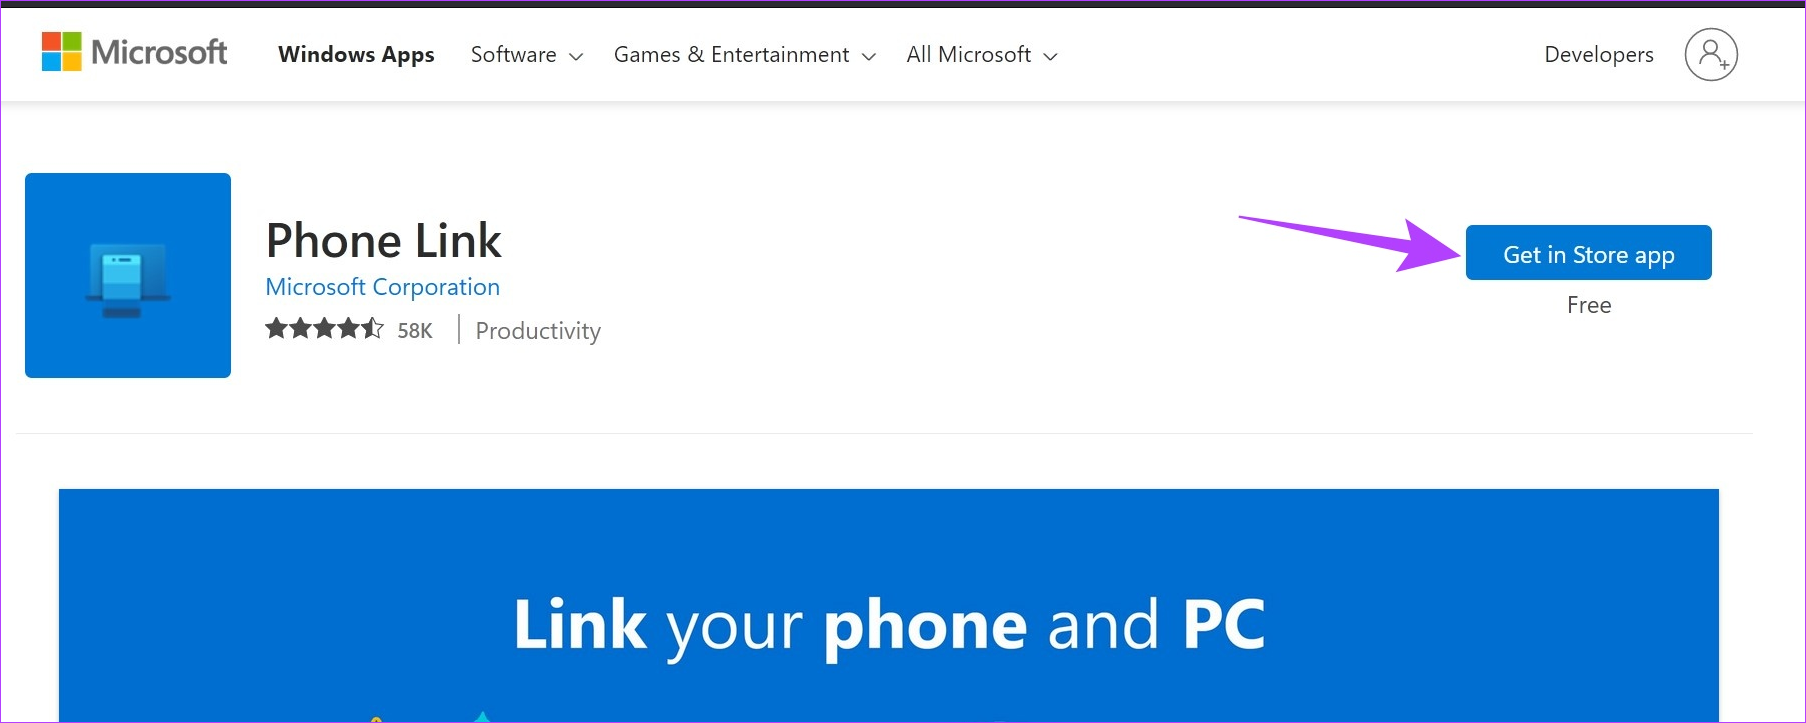
Step 1: Open the Phone Link app in Microsoft Store.
Step 2: Here, click on ‘Get in Store app’. This will open the Microsoft Store window on your device.
Step 3: If available, click on Update.
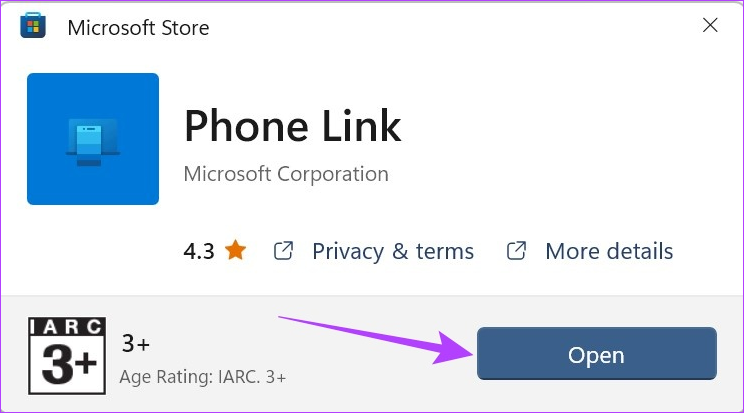
Wait for the update to finish installing. Then, open the app again and check if notifications are working as expected. You can also update the Phone Link app on your Android and iOS devices by going to the respective pages on the Google Play Store and App Store and checking if an update is currently available.
FAQs for Using Phone Link on Windows 11
Open the Phone Link app and click on Calls. Here, use the dialer to make calls using your Windows 11 device. Additionally, you can also use other apps like WhatsApp to call from Windows PC.
Yes, you can now use the Phone Link app to link to an iPhone.
Never Miss a Notification
Timely notifications help keep you updated. So, we hope that with this article, you were able to fix the issue of the Phone Link app not showing notifications on Windows 11. You can also check out our other article if you’ve been having issues using the Phone Link app with your iPhone.

